Thursday, December 31, 2015

Holly New Year's Greetings


Hi, friends!  Happy New Year's Eve!  I know that Christmas is past, but I still feel it's the "holiday" season, so I have a seasonal greeting to share with you to ring in the New Year!  Take a peek...


This card uses the beautiful Glorious Holiday stamp set.  I stamped the holly, water colored it, then fussy cut it out before adding a bit of dimension and adding it to my focal panel.  I put some cheesecloth underneath the image for a bit more texture, as well as a smattering of pearls to accent the image and add some elegance.


The image was stamped, then I punched on end to make it look a bit like a banner.  I added it directly to the gussied up card base because I thought the contrast was super pretty.  I hope you agree!


A few other bits were added to this card to add texture and finish--a half doily and some pleated ribbon.  I just love how elegant this looks, and I hope you like it, too!  Please leave me a comment below and let me know your thoughts. :)


That's all for me today, friends!  I hope you have a wonderful day and spend lots of time with your loved ones. :)  I'll be back again later with more creations using products from the Red Rubber Designs store.  Until then, HUGS and happy stamping to you all! :)

blog sig 2015-16 photo Signature_1.png

Project supplies:

Thursday, December 24, 2015

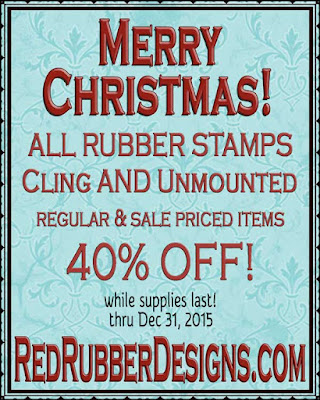
Merry Christmas 2015!

Wishing all of you a happy holiday season!


A gift from me to you:


 40% OFF ALL RUBBER STAMPS!

NO COUPON NEEDED!
(discount is calculated in your shopping cart)


Thursday, December 17, 2015

Sew Thoughtful


Hello, Friends!   Can you believe that Christmas Eve is one week from today?  For the most part, your Christmas cards are probably created and mailed so I thought it would be fun to depart from Holiday greetings and get a jump start on those "thank you" cards!  

I chose the lovely Sew Thoughtful stamp set and added lots of pink!!!  

 I used distress inks and water to create my tag, then once dried I stamped the dress form on the tag.  Ribbons, lace, tulle and some distressing finish off a pretty in pink, thank you card!


That's it for me today.  I hope you are enjoying the season!  Before I go I will leave you with a look at the beautiful Sew Thoughtful stamp set, and it's companion stamp Sew Thankful.

Hugs,
Ang 


Thursday, December 10, 2015

Holidays Wreath Card Set

     Stamping is so easy and versatile for making Christmas cards, as you can make a lot at once, yet change it up with different colors of ink or embossing powders! I personally get bored doing repetitive cards over the holidays, so I kept the same design here, but added different colors of paint, ribbons, and embossing powders, featuring the Holiday Wreath Unmounted Stamp Set from Red Rubber Designs. Holiday Wreath is the Spotlight Stamp for December which means you can get it for 40% off it's regular price with any order!


        These cards were made with Kraft Cardstock, and dry painted with two different colors of paint in a vertical line to mimic wood grain. The base of the cards were cut at 3-3/4" X 5-1/4". Then I cut a rectangle at 3-1/4" X 4-3/4", and scored lines 1/4" away on the back side, to make it look like a panel on a door. I used Palette inks around the edges and over the scored lines, to really bring it out. Before adhering the cut panel to the card, I added a brad to the right for the door knobs. Then I embossed the wreaths on the doors, as well as the sentiment in the center. To finish them off, I added some Stickles on the wreaths, with a bow on top, made from ribbon.


     Here's a closer look at the scored lines on the blue card! To save time you could always use a wood grain paper, instead of painting, and ink for your stamping, instead of embossing powders.  


****************************************

The stamps featured are also available in Cling Mount Sets:


Happy Holidays!


Thursday, December 3, 2015

Silhouette Nativity


Hi there,

Welcome to the Red Rubber Designs Thursday Inspirations! Today I'm featuring this lovely stamp set called Silhouette Nativity found HERE. The sentiment is from With His Glory stamp set found HERE.


Here's how I made this card: First I started with the background using distress inks in Gathered Twigs, Seedless Preserves, Salty Ocean and Chipped Sapphire onto white card stock. I planned my layout on a separate piece of paper. When I was happy with placement I started with the crèche, stamping it in about lower center.

I masked off the crèche and then added the animals to either side and palm trees last.  You can also use a Stamp-A-Ma-Jig for placement. Then I stamped the star and angel. I added stars with a white gel pen and added the sentiment.


Featured Stamps:

Happy Stamping!