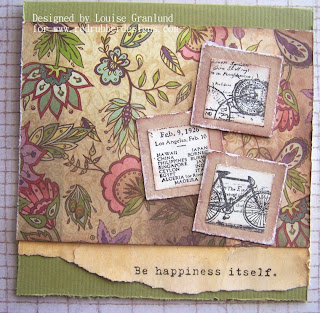
Creating with little works of stamped art which are only one inch by one inch can be fun and add a new dimension to card creating or other crafting. No need to be intimidated by creating such mini works of art as you'll see from this tutorial.
I'll focus on creating two types of "inchies" here. The first one is going to show you how to create your own inchie art by adding elements to a 1x1 inch square.
Later I'll demonstrate how to have fun just punching 1x1-inch squares from stamped work.

My first card shows an inchie as a focal point. It's easy to use this tiny work of art and build a whole card around it as you see here.
To create this inchie I'm using two stamps from the Red Rubber Designs line: Fanciful Vintage and Enjoy the Scenery. A one-inch punch is not a necessity, but makes this a lot easier.
After I've stamped out both my stamps, I punch a one-inch square from my dates stamp to create a background canvas. I've added some ink to color the background.
I then cut out the image of the face from the stamp below and color it as well.
After adding the female face to my inchie background, I attached a small faux rhinestone. I then back the inchie with several layers of cardstock and I've created my first piece of inchie art!
~~~~~~~~~~~~~~~~~~~~~~~~~~~~~
Anothe fun way to create inchie art is to simply punch one-inch squares from your stamped images. The fun with this method is it causes you to look at your stamps in a different way, finding specific parts of the stamp you like and that would work well on a small canvas.
Below is one of my favorite collage stamps, Fly Fairy. I easily see that I can punch out different parts of this stamp to create 1x1 pieces.
After punching three separate pieces, I backed them with some larger cardstock and then attached them to my card. I added a sentiment at the bottom to complete this simple card. It couldn't be much easier!
~~~~~~~~~~~~~~~~~~~~~~~~~
Finally, although a little more involved, the project below involves using both creating inchies and well as simple stamped inchies.
I started by stamping the image Twinkle in Your Eye three times on three different colors of cardstock.
For the grid card below I created an inchie from an image and word using the Twinkle stamp. You'll see this one in the middle of my grid.
The remaining inches were punched from the different colors of paper. Notice how you can find a variety of different images to punch as you look closely at a stamp.
I then arranged my inchies on a cream colored piece of cardstock to create this card which looks a lot more difficult than it actually was!


What lovely punched inchies - the bicycle trio are delightful on their card, and I love the tic tac toe board at the end - gorgeous colours! Thanks so much for all the ideas and inspiration!
ReplyDeleteAlison x
I've heard people talk about "inches" but never have done them. That is interesting, Louise. Thanks for the tutorial.
ReplyDeleteGorgeous cards Louise, TFS!
ReplyDeleteI know I say it every time, but I'm amazed at what can fit in these tiny spaces...WOW! Vintage loveliness on this card! Love the inchie mosaics!
ReplyDelete